TOP
Menu

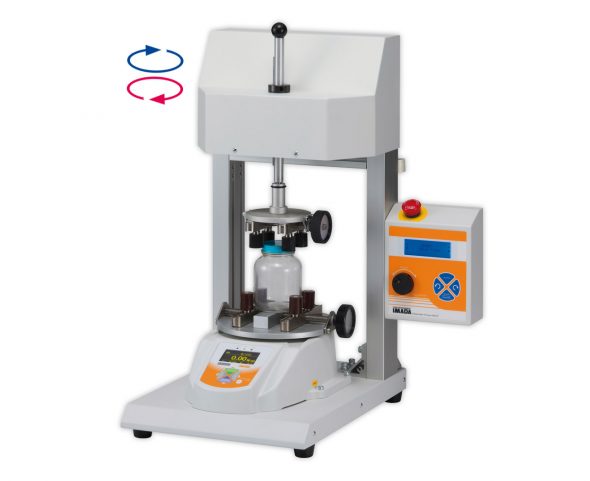
Torque Stand MTS

Measuring ranges 0 - 50.00 Ncm, 0 - 2.000 Nm, 5.000 Nm or 10.00 Nm
resolution depending on the range 0.01 Ncm, 0.001 Nm or 0.01 Nm

Motorized test stand for determining and testing the opening and closing forces of screw caps, used for bottles, cans, cosmetic products etc. Further application areas are testing torque switches, plugs, lenses etc.
The most important sectors of industry are the pharmaceutical, cosmetics, beverage and electronic industry, etc.

Torque stand assures constant, identical measuring conditions

CE mark
Category:

Special Features Torque Stand


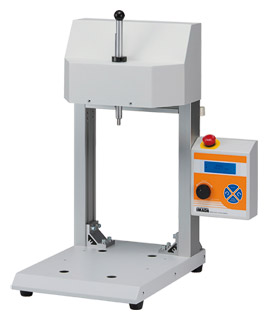
The motorized torque stand MTS can be configurated according the customers demand. The torque stand exists out of a test stand depending the sample height, a torque meter with different ranges and features as well as a upper chuck and lower table.

The torque will be measured without influence by the operator. The results are more accurate and significant as measured with a manual device.

3 operation modes:
– Manual: Revolution occurs in the selected direction, until the stop-switch will be pressed.
– +NG Stop: Revolution occurs in one direction, until the adjusted value is reached.
– Endurance Test: Repeats the operation in two directions (open – close), within the adjusted limits (MTS series). The number of repeats are shown in the display. The opening and closing angle, as well as the number of repeats can be adjusted with torque stand MTS-RA series.

The following information are shown in the display:
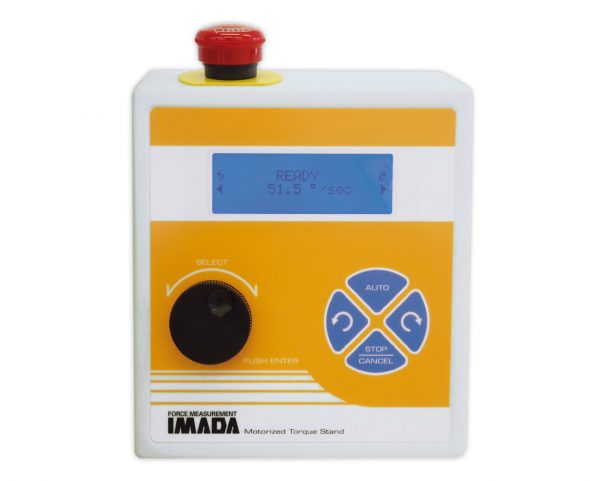
– Rotational speed e. g. 51.5 °/sec
– Status of the instrument
– Operation mode
– Counter for endurance test

Max. size of samples:
– upper clamping chuck Ø 20 – 90 mm or Ø 7 – 50 mm
– lower clamping table Ø 20 – 160 mm or Ø 7 – 50 mm
– Max. available sample height 140, 240 mm or 340 mm

The rotation speed can continuously be adjusted to 3 – 90 degree/sec. The value will be displayed

Special Features DTXS and DTXA


2 Display Modes:
– Real Time: displays the actual torque
– Peak Force: to measure and save the peak torque

Display the opening or closing torque (clockwise and counter clockwise torque)

3 selectable units: Nm, kgfm, Lbf.in or Ncm, kgfcm, ozf.in

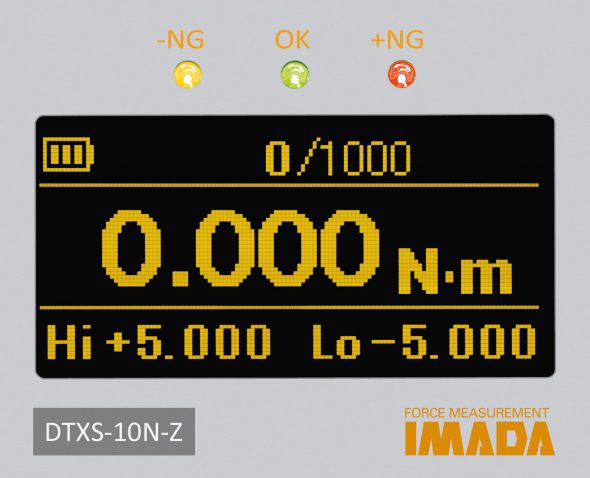
Programmable high/low setpoints for go/no-go testing with colour-coded indicators (orange, green, red) in the LED display

Torque meter with high internal sampling rate of 2000 times/sec to capture peak values

Storage of 1000 values for recall:
– On the display
– For data transfer to a PC
– For printing with report

3 output signals:
USB, RS-232and  analog

Display update time 16 times/sec

Easy to read display (OLED) for Real Time or Peak value including units. Depending to the series additional information are displayed as e. g. memory, number of good tests, limits, 1st and 2nd peak values etc.

Special features of model DTXA in comparison to the standard model DTXS:


Indication of 1st and 2nd peak value per measurement, e. g. closure with predetermined break point

Readings can be transferred from the internal memory to an USB flash drive or directly saved on it (sampling rate 100 times/sec)

2 comparator values can be set; If the reading reaches one of the output values, data will be sent to external devices (e.g. PC, printer) for data recording

Special features of model MTS-RA in combination with the torque meter DTXA in comparison with the standard model MTS with the torque meter DTXS


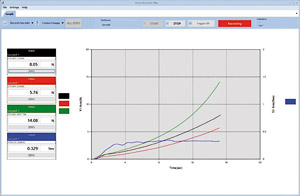
Torque-angle measurements are possible. The software “Force Recorder Professional” is additionally required

Standard Features


Torque stand MTS for fast, accurate measuring

High repeatability

Easy to use

Inclusive 30 days trial version of Software »Force Recorder Professional«

Manufacturer`s certificate with measured values is included

Available Torque Stands

ModelMax. Sample Height
Description
MTS-10N 140 mm
MTS-10N-L240 mm
MTS-10N-2L340 mm
MTS-10N-RA 140 mmwith rotary encoder
MTS-10N-L-RA240 mmwith rotary encoder
MTS-10N-2L-RA340 mmwith rotary encoder

Available Models – Standard Model*

ModelModelMeasruing Range
Resolution
DTXS-0.5N DTXA-0.5N0 – 50.00 Ncm0.01 Ncm
DTXS-2N DTXA-2N0 – 2.000 Nm (200 Ncm)0.001 Nm (0.1 Ncm)
DTXS-5NDTXA-5N0 – 5.000 Nm (500 Ncm)0.001 Nm (0.1 Ncm)
DTXS-10NDTXA-10N0 – 10.00 Nm (1000 Ncm)0.01 Nm (1 Ncm)

*inclusive table DT-TB

Available Models – self configurated

ModelModelDescription
DTXS-0.5N-ZDTXA-0.5N-Zwithout table
DTXS-2N-ZDTXA-2N-Zwithout table
DTXS-5N-Z DTXA-5N-Z without table
DTXS-10N-Z DTXA-10N-Zwithout table
Specifications

Torque Stand
Sample Height:Max. 140, 240 or 340 mm
Speed:3 – 90 °/sec adjustable
Temperature range:0 – 40 °C
Air humidity:80 % RH, max.
Power supply:100 – 240 V AC, 50/60 Hz, max. 3 A
Housing dimensions:See dimensions
Weight:14 kg net without accessories
Torque Meter
Accuracy:±0.5 % full scale ±1 digit
Measuring frequency:2000 times/sec
Selectable units:Nm, kgfm, Lb.in or Ncm, kgfcm, Lb.in
Display:OLED, 4 digit, 14 mm high
Overload protection:Approx. 200 % full scale, flashing display beyond 110 % full scale
Display update:16 times/sec
Memory:Internal memory for max. 1000 values, (clockwise or counter clockwise and peak values)
Setpoints:MIN (-NG), MAX (+NG) adjustable with output signal
Output signal:USB
RS-232 (8, 1, N, 19200)
analog ±2 V DC
Open collector 4x (+NG, Ok, -NG, OVL), max. 30 V DC, 10 mA
overload signal
Temperature range:0 – 40 °C
Air humidity:80 % RH max.
Power supply:Rechargeable NiMH batteries (approx. 6.5 hours continuous use,
approx. 2 h charging time) and/or AC adapter 100 – 240 V AC
and two adapters (EU/USA)
Housing dimensions:305 x 233 x 127 mm (LxWxH)
Weight, net (gross):Approx. 4900 g (5900 g)
Additional functions model DTXA in comparison to model DTXS:
Memory:Readings can be transferred from the internal memory to an USB flash drive or directly saved on it (sampling rate 100 times/sec)
High low output:2 high/low output values can be set. If the reading reaches one of the output values, data will be sent to external devices (e. g. PC, printer) for data recording
Extended peak mode:Indication of two peak values per measurement
Additional functions model MTS-RA in combination with DTXA:
Torque-displacement-measurement:The Software Force Recorder Professional is required

Specifications subject to change without notice!

Required Moduls

  1. Torque Stand

    Drehmomentprüfstand MTSAvailable with standard features or with code RA (Necessary for torque-angle measurements). Sample Height up to 340 mm

  2. Torque Meter

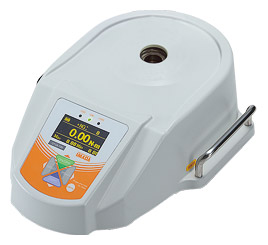
    Drehmomentmesser DTXA-ZAvailable as standard model DTXS or DTXS-Z, as well as torque meter DTXA or DTXA-Z with additional functions (Necessary for torque-angle measurements).
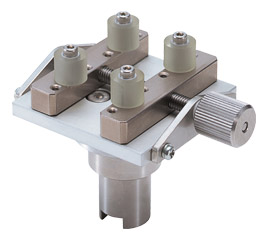
    The models DTXS and DTXA will be delivered with standard table, while type Z has no clamping device.


  3. Lower Clamping Table

    kleiner Spanntisch DT-STThe lower clamping device has to be mounted at the torque meter. It can be selected between a large or a small clamping table, as well as a torque pin chuck. The clamping tables are available with different table pins.
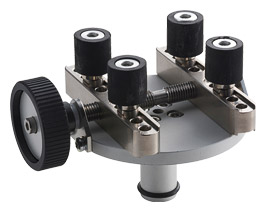

  4. Upper Clamping Chuck

    Spanntisch MT-TBThe upper clamping device has to be mounted at the torque stand. It can be selected between a large or a small clamping chuck, as well as a torque pin chuck or an adapter with M10 male thread. The small clamping chuck is available with different table pins.

  5. Software

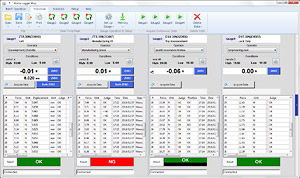
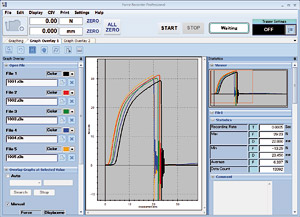
    Force Recorder ProfessionalThe software “Force Recorder” is required for data acquisition by USB output. 3 versions are available, in which “Force Recorder Professional” is necessary for torque-angle measurements.
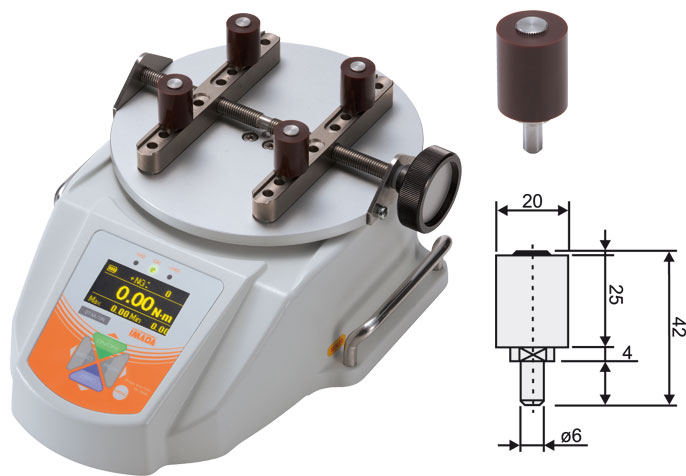

Lower Clamping Table

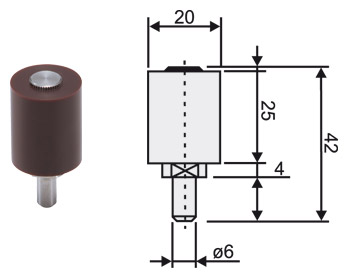
  1. DT-TB - Table with 25 mm Urethane Pins

    not for DTXS-0.5N and DTXA-0.5N
    For samples with Ø from 20 up to 160 mm.
    Includes table pins (TB-P) with urethane surface, length 25 mm.
    Recommended for PET bottles, cans etc.
    Order number: DT-TB


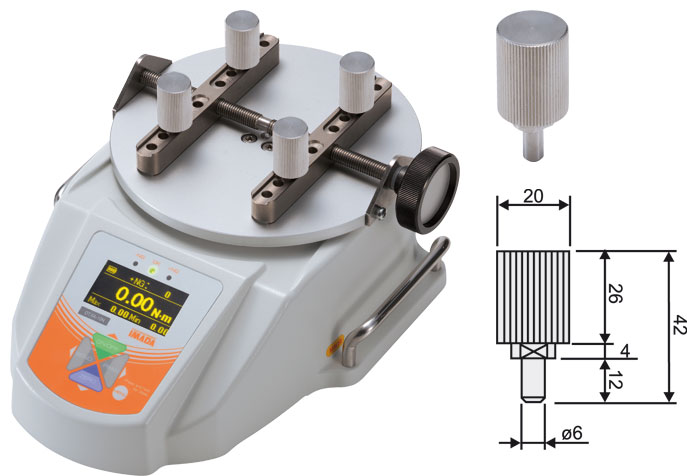
  2. DT-TB-01 - Table with 26 mm V2A Pins

    not for DTXS-0.5N and DTXA-0.5N
    For samples with Ø from 20 up to 160 mm.
    Includes table pins (TB-01P) from stainless steel V2A, corrugated surface, length 26 mm.
    Recommended for aluminium cans, hard plastic containers etc.
    Order number: DT-TB-01


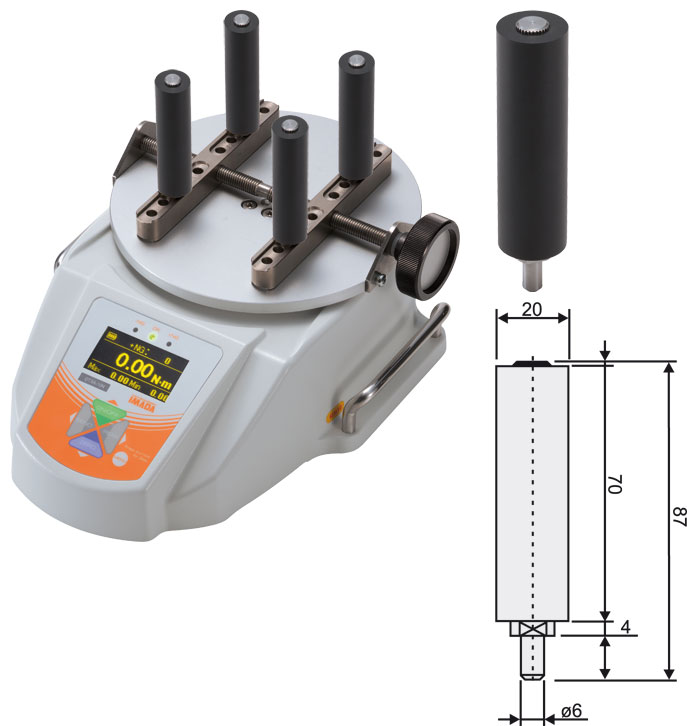
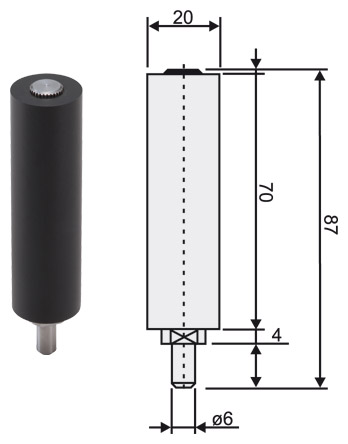
  3. DT-TB-02 - Table with 70 mm Urethane Pins

    not for DTXS-0.5N and DTXA-0.5N
    For samples with Ø from 20 up to 160 mm.
    Includes table pins (TB-02P) with urethane surface, length 70 mm.
    Recommended for conductor plates, lens of cameras, large bottles, etc.
    Order number: DT-TB-02


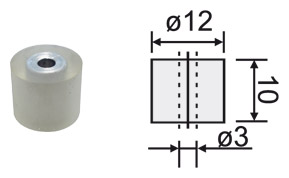
  4. DT-ST - Small Table with 10 mm Urethane Pins for max. 5 Nm nominal load

    Only for DTXS-2N, DTXS-5N, DTXA-2N and DTXA-5N
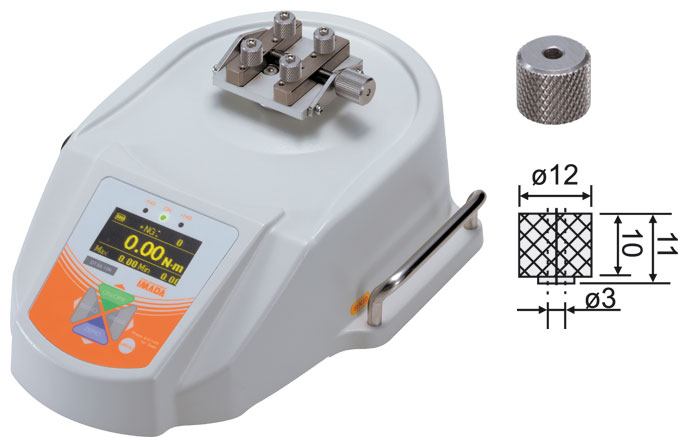
    For samples with Ø from 7 up to 50 mm.
    Includes table pins (ST-P) with urethane surface, length 10 mm.
    Recommended for locks, containers for eye drops, etc.
    Order number: DT-ST


  5. DT-ST-01 - Small Table with 10 mm V2A Pins for max. 5 Nm nominal load

    Only for DTXS-2N, DTXS-5N, DTXA-2N and DTXA-5N
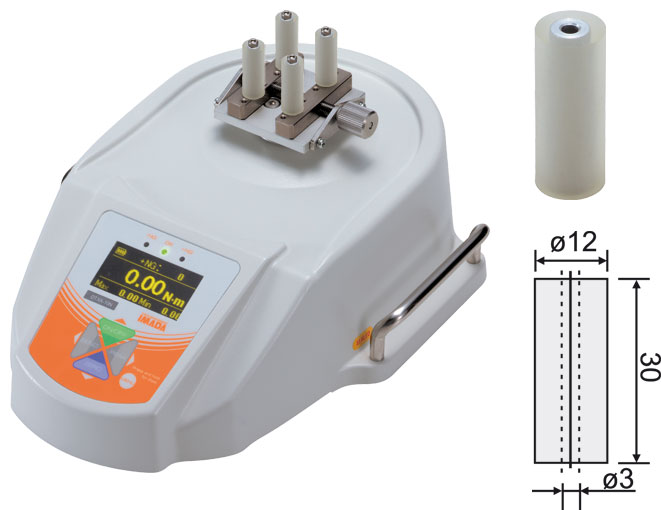
    For samples with Ø from 7 up to 50 mm.
    Includes table pins (ST-01P) from stainless steel V2A, corrugated surface, length 10 mm.
    Recommended for electronic components, plugs, etc.
    Order number: DT-ST-01


  6. DT-ST-02 - Small Table with 30 mm Urethane Pins for max. 5 Nm nominal load

    Only for DTXS-2N, DTXS-5N, DTXA-2N and DTXA-5N
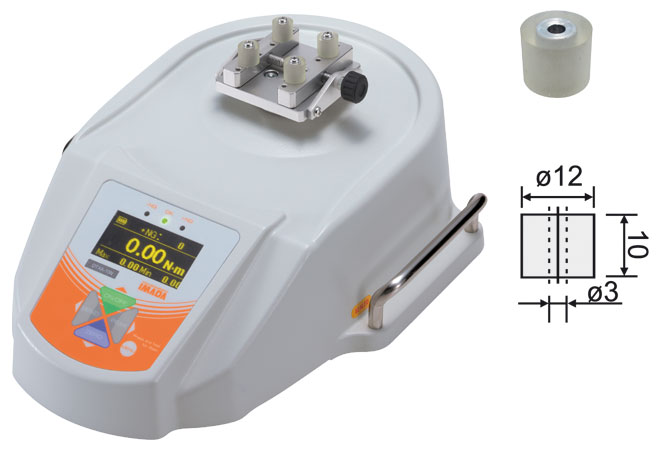
    For samples with Ø from 7 up to 50 mm.
    Includes table pins (ST-02P) with urethane surface, length 30 mm.
    Recommended for cosmetics boxes, door knobs, lamps, etc.
    Order number: DT-ST-02


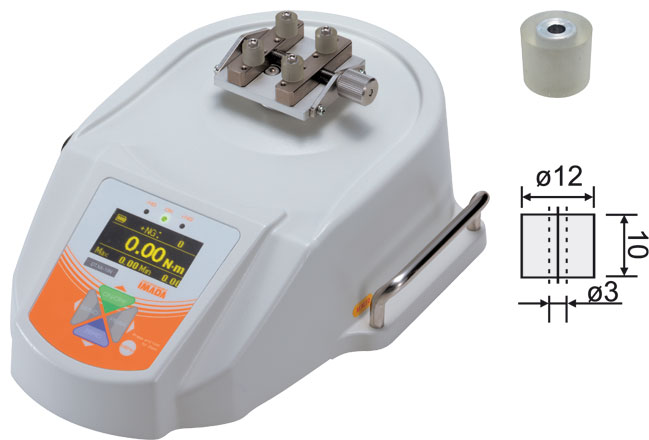
  7. DT-STL - Small Table with 10 mm Urethane Pins for max. 2 Nm nominal load

    small table DT-STL for torque meter DTXS and DTXAOnly for DTXS-0.5N, DTXS-2N, DTXA-0.5N and DTXA-2N
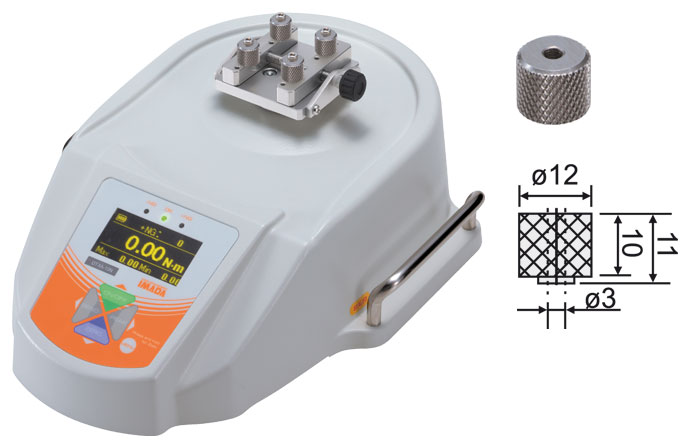
    For samples with Ø from 7 up to 50 mm.
    Includes table pins (ST-P) with urethane surface, length 10 mm.
    Recommended for plastic tubes, etc.
    Order number: DT-STL


  8. DT-STL-01 - Small Table with 10 mm V2A Pins for max. 2 Nm nominal load

    small table DT-STL-01 for torque meter DTXS and DTXAOnly for DTXS-0.5N, DTXS-2N, DTXA-0.5N and DTXA-2N
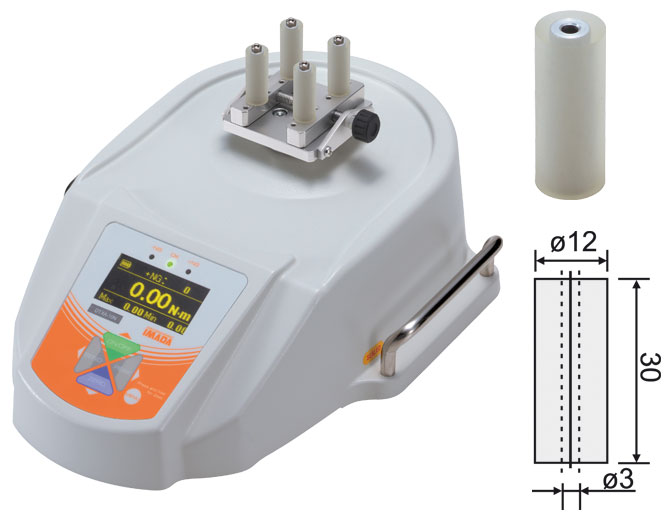
    For samples with Ø from 7 up to 50 mm.
    Includes table pins (ST-01P) from stainless steel V2A, corrugated surface, length 10 mm.
    Recommended for motors, etc.
    Order number: DT-STL-01


  9. DT-STL-02 - Small Table with 30 mm Urethane Pins for max. 2 Nm nominal load

    small table DT-STL-02 for torque meter DTXS and DTXAOnly for DTXS-0.5N, DTXS-2N, DTXA-0.5N and DTXA-2N
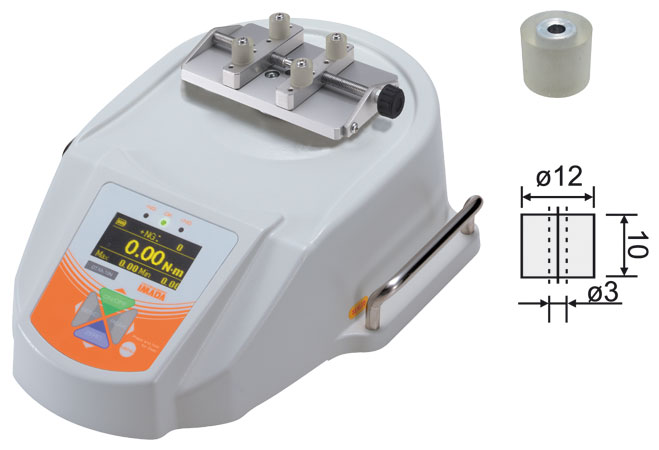
    For samples with Ø from 7 up to 50 mm.
    Includes table pins (ST-02P) with urethane surface, length 30 mm.
    Recommended for cosmetic containers, etc.
    Order number: DT-STL-02


  10. DT-STLW - Small, wide Table with 10 mm Urethane Pins for max. 2 Nm nominal load

    small table DT-STLW for torque meter DTXS and DTXAOnly for DTXS-0.5N, DTXS-2N, DTXA-0.5N and DTXA-2N
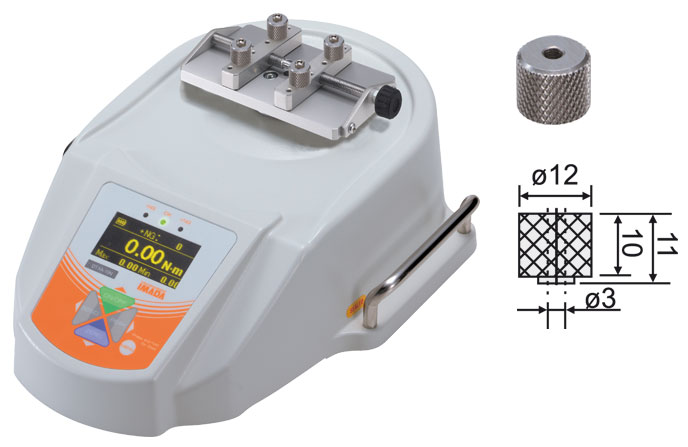
    For samples with Ø from 10 up to 100 mm.
    Includes table pins (ST-P) with urethane surface, length 10 mm.
    Recommended for volume dials, etc.
    Order number: DT-STLW


  11. DT-STLW-01 - Small, wide Table with 10 mm V2A Pins for max. 2 Nm nominal load

    small table DT-STLW-01 for torque meter DTXS and DTXAOnly for DTXS-0.5N, DTXS-2N, DTXA-0.5N and DTXA-2N
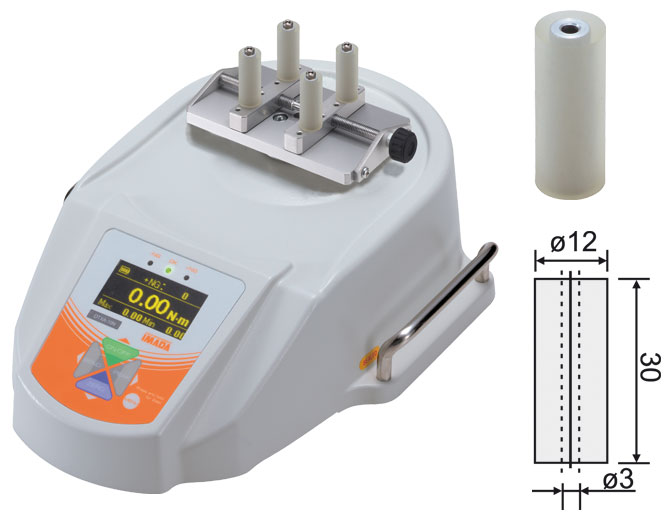
    For samples with Ø from 10 up to 100 mm.
    Includes table pins (ST-01P) from stainless steel V2A, corrugated surface, length 10 mm.
    Recommended for motors, etc.
    Order number: DT-STLW-01


  12. DT-STLW-02 - Small, wide Table with 30 mm Urethane Pins for max. 2 Nm nominal load

    small table DT-STLW-02 for torque meter DTXS and DTXAOnly for DTXS-0.5N, DTXS-2N, DTXA-0.5N and DTXA-2N
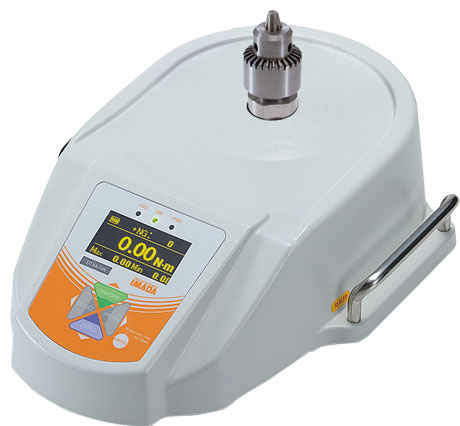
    For samples with Ø from 7 up to 50 mm.
    Includes table pins (ST-02P) with urethane surface, length 30 mm.
    Recommended for bottle shaped containers, etc.
    Order number: DT-STLW-02


  13. DT-DC-6.5 - Torque Pin Chuck Ø 0.5 up to 6.5 mm

    Infinitely adjustable, Ø 0.5 up to 6.5 mm
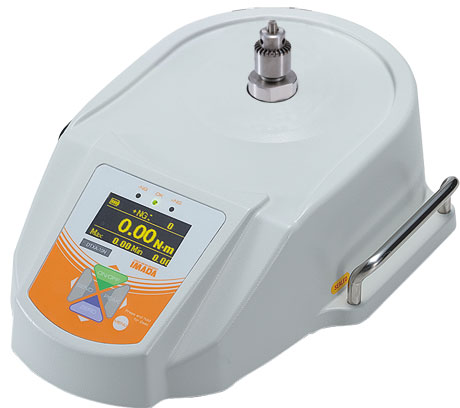
    Order number: DT-DC-6.5


  14. DT-DC-6.5SUS - Torque Pin Chuck (V2A) Ø 0.5 up to 6.5 mm

    Infinitely adjustable, Ø 0.5 up to 6.5 mm, stainless steel (V2A)
    Order number: DT-DC-6.5SUS


  15. DT-DC-4 - Torque Pin Chuck Ø 0.5 up to 4 mm

    Infinitely adjustable, Ø 0.5 up to 4 mm (for torque meters with 2 or 5 Nm nominal load).
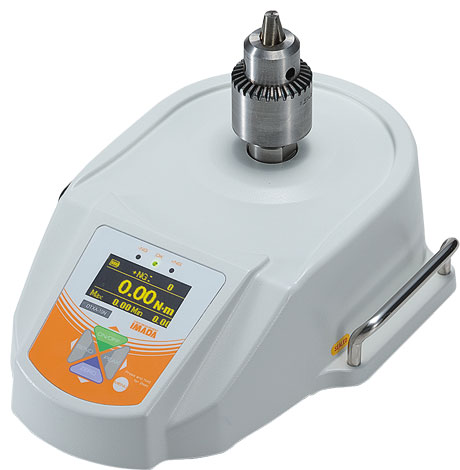
    Order number: DT-DC-4


  16. DT-DC-13 - Torque Pin Chuck Ø 1.2 up to 12 mm

    Infinitely adjustable, Ø 1.2 up to 13 mm (for torque meters with 5 or 10 Nm nominal load).
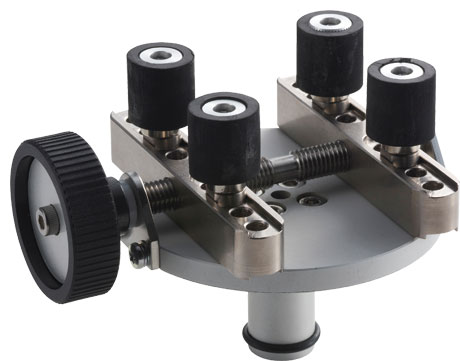
    Order number: DT-DC-13


Upper Clamping Chuck

  1. MT-TB - Clamping Chuck with Urethane Pins

    For samples with Ø from 20 up to 90 mm.
    Includes table pins with urethane surface. It is recommended to use a torque wrench or torque driver to make the chucking force stable (4 mm hexagon bit is required). Recommended for screw caps, conductor plates, lens of cameras etc.
    Order number: MT-TB


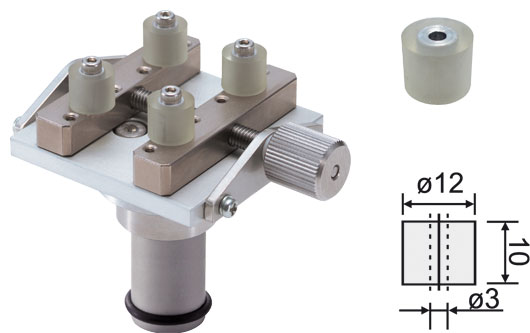
  2. MT-ST - Clamping Chuck with 10 mm Urethane Pins

    For samples with Ø from 7 up to 50 mm (for max. 5 Nm nominal load)
    Includes table pins (ST-P) with urethane surface, length 10 mm. Recommended for locks, containers for eye drops, etc.
    Order number: MT-ST


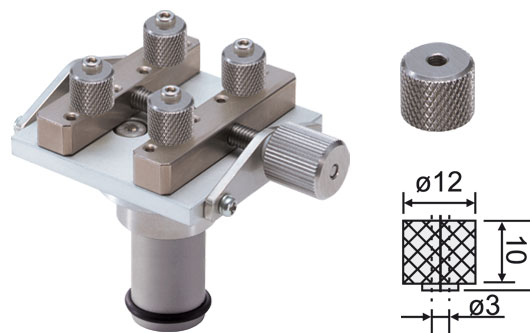
  3. MT-St-01 - Clamping Chuck with 10 mm V2A Pins

    For samples with Ø from 20 up to 50 mm (for max. 5 Nm nominal load).
    Includes table pins (ST-01P) from stainless steel V2A, corrugated surface, length 10 mm.
    Recommended for electronic components, plugs, etc.
    Order number: MT-ST-01


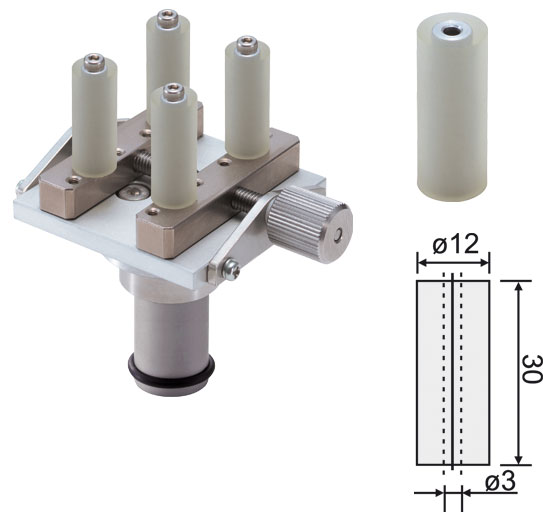
  4. MT-ST-02 - Clamping Chuck with 30 mm Urethane Pins

    For samples with Ø from 7 up to 50 mm (for max. 5 Nm nominal load)
    Includes table pins (ST-02P) with urethane surface, length 30 mm.
    Recommended for cosmetics boxes, door knobs, lamps, etc.
    Order number: MT-ST-02


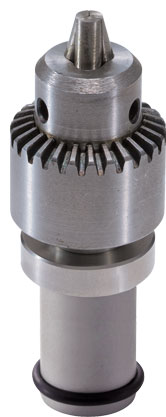
  5. MT-DC-6.5 - Torque Pin Chuck Ø 0.5 up to 6.5 mm

    Infinitely adjustable, Ø 0.5 up to 6.5 mm
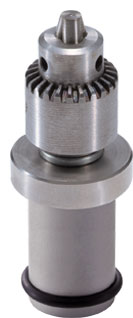
    Order number: MT-DC-6.5


  6. MT-DC-6.5SUS - Torque Pin Chuck (V2A) Ø 0.5 up to 6.5 mm

    infinitely adjustable, Ø 0.5 up to 6.5 mm, V2A
    Order number: MT-DC-6.5SUS


  7. MT-DC-4 - Torque Pin Chuck Ø 0.5 up to 4 mm

    infinitely adjustable, Ø 0.5 up to 4 mm
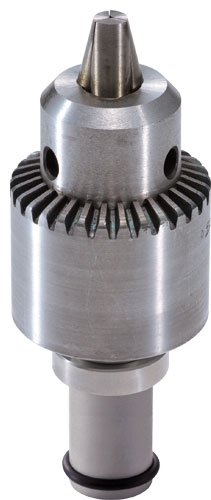
    (for max. 5 Nm nominal load)
    Order number: MT-DC-4


  8. MT-DC-13 - Torque Pin Chuck Ø 1.2 up to 12 mm

    infinitely adjustable, Ø 1.2 up to 12 mm
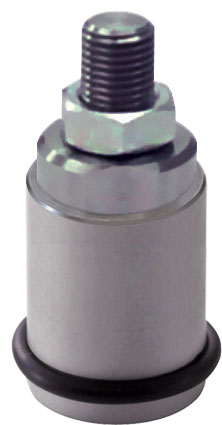
    (for torque meters with 5 or 10 Nm nominal load)
    Order number: MT-DC-13


  9. MT-AD-M10 - Adapter

    With M10 male thread
    Order number: MT-AD-M10

  10.  

Standard Accessories

  1. Software Force-Logger

    Software Force LoggerUSB cable approx. 1.5 m long, CD-ROM with USB-driver and software “Force-Logger” for data transfer


  2. CB-528 - Connecting Cable

    Connecting cable CB-528Connecting cable for torque meter with torque stand to stop feed at Fmax or overload (force control).
    Length approx. 1.5 m
    Order Number: CB-528

    Only standard accessory for torque stand without rotary encoder


  3. CB-728 - Connecting Cable RA

    Connecting cable CB-728Connecting cable for torque meter with torque stand with rotary encoder to enable torque-angle measurement.
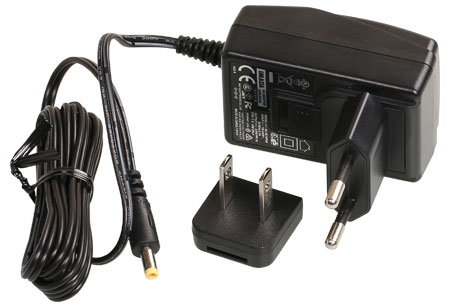
    Length approx. 1.5 m
    Order number: CB-728

    Only standard accessory for torque stand with rotary encoder


  4. ADW-6010 - AC Adapter

    Netzteil ADW-6010AC adapter for 100 – 240 V AC
    Order number: ADW-6010


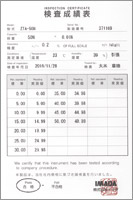
  5. Inspection Certificate

    Hersteller PrüfprotokollDelivery includes a manufacturers inspection certificate free of charge.
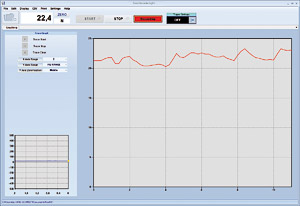

Accessories optional

  1. SW-21 - Force Recorder Light

    Force Recorder Light

    Software for data acquisition by USB output
    – Force-time graph
    – Force gauge function setting
    – Data storage as CSV file
    Requirements: Microsoft Windows 8.1/10/11
    Order number: SW-21


  2. SW-22 - Force Recorder Standard

    Force Recorder Standard

    Additional functions in comparison to Force Recorder Light:
    5 graphs at maximum can be displayed in a table
    Requirements: Microsoft Windows 8.1/10/11
    Order number: SW-22


  3. SW-23 - Force Recorder Professional

    Force Recorder Professional

    Additional function in comparison to Force Recorder Light
    – 5 graphs at maximum can be displayed in a table
    – Force-displacement graphing (possible only in combination with a test stand with linear
    scale)
    Requirements: Microsoft Windows 8.1/10/11
    Order number: SW-23


  4. SW-26 - Force Recorder Plus

    Software Force Recorder Plus

    Software for Data acquisition by USB output:
    – 10 graphs at maximum can be displayed in a table
    – data acquisition of 4 force gauges simultaneously
    – force gauge function setting
    – data storage as CSV file
    Requirements: Microsoft Windows 8.1/10/11
    Order number: SW-26


  5. SW-13 - Force Logger Plus

    Force Logger Plus

    Software for Data acquisition by USB output:
    – data acquisition of 4 force gauges simultaneously
    – force gauge function setting
    – data storage as CSV file
    Requirements: Microsoft Windows 8.1/10/11
    Order number: SW-13


  6. TB-P - Table Pins 25 mm Urethane

    Spannstifte TB-P für den großen Spanntisch1 set (4 pieces), 25 mm long with urethane surface for the table.
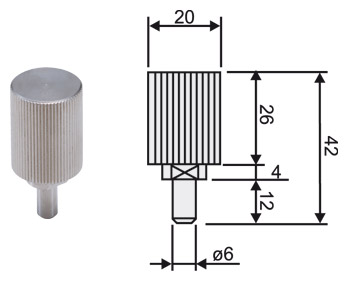
    Recommended for PET bottles, cans etc.
    Order number: TB-P


  7. TB-01P - Table Pins 26 mm V2A

    Spannstifte TB-01P für den großen Spanntisch
    1 set (4 pieces), 26 mm long from stainless steel for the table.
    Recommended for aluminium cans, hard plastic containers etc.
    Order number: TB-01P


  8. TB-02P - Table Pins 70 mm Urethane

    Spannstifte TB-02P für den großen Spanntisch1 set (4 pieces), 70 mm long with urethane surface for the table.
    Recommended for conductor plates, lens of cameras, large bottles, etc.
    Order number: TB-02P


  9. ST-P - Table Pins 10 mm Urethane

    Spannstift ST-P für den kleinen Spanntisch1 set (4 pieces), 10 mm long with urethane surface for the small table.
    Recommended for locks, containers for eye drops, etc.
    Order number: ST-P


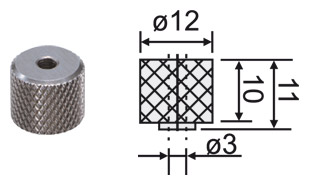
  10. ST-01P - Table Pins 10 mm V2A

    Spannstift ST-01P für den kleinen Spanntisch1 set (4 pieces), 10 mm long from stainless steel for the small table.
    Recommended for electronic components, plugs, etc.
    Order number: ST-01P


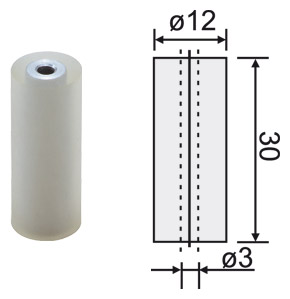
  11. ST-02P - Table Pins 30 mm Urethane

    Spannstift ST-02P für den kleinen Spanntisch1 set (4 pieces), 30 mm long with urethane surface for the small table.
    Recommended for cosmetics boxes, door knobs, lamps, etc.
    Order number: ST-02P


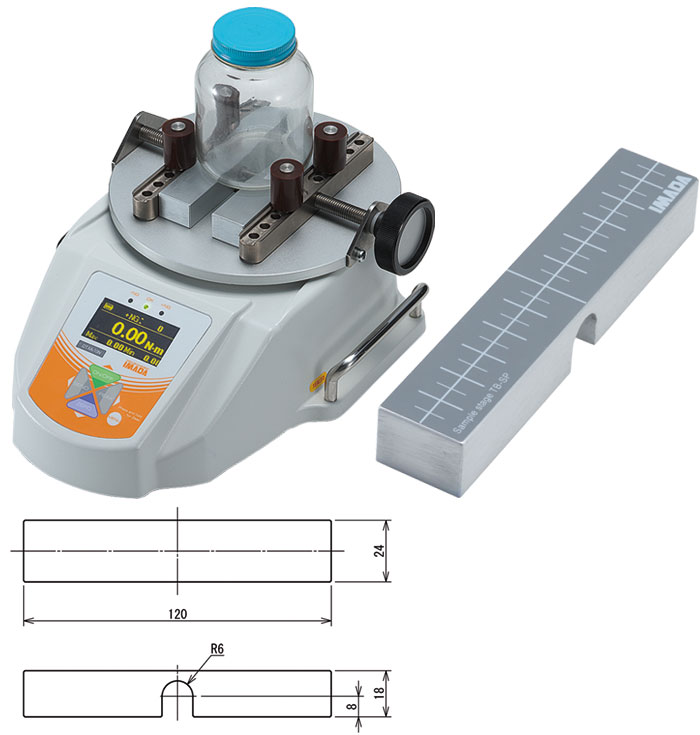
  12. TB-SP - Sample Stage

    To get a flat working face on the table, for placing the sample. Delivery includes 1 piece.
    Only for DT-TB, DT-TB-01 and DT-TB-02
    Order number: TB-SP


  13. MT-EXT - Extension Shaft

    Extension shaft of torque stand MTSFor lengthening the main shaft to clamp samples with lower height.
    Length 100 mm
    Order number: MT-EXT


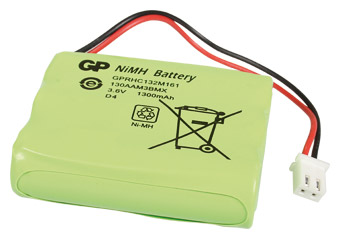
  14. 40018I - Accumulator

    Akku DP-308Nickel metal hydride accumulator, 2-pole connector
    3.6 V, 1300 mAh
    Order number: 40018I


Cables optional

  1. CB-108 - Connecting Cable analog

    analoges Anschlusskabel CB-101For analog output, for connection to a line recorder.
    Length approx. 3 m
    Order number: CB-108


  2. CB-208 - Connecting Cable RS-232

    RS-232 Anschlusskabel CB-208For RS-232 output with sub D 9 female, for connection to PC.
    Length approx. 3 m
    Order number: CB-208


  3. CB-808 - Connecting Cable Trigger Input

    Anschlusskabel für Triggereingang CB-808For trigger input (input signal from an external device e. g. electronic switch to stop the measurement)
    Order number: CB-808


  4. CB-908 - Connecting Cable Open Ends

    Anschlusskabel mit offenen Enden CB-908With open ends (37-pin) for all available output signals to connect an unique device.
    Order number: CB-908


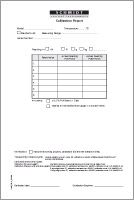
Calibration Report

Kalibrierzeugnis-Calibration Certificate Hans Schmidt GmbHCalibration Certificate
including a calibration report is optional available.


Dimensions

Dimensions of torque stand MTS to download:
Delivery Includes

Torque stand MTS, torque meter, upper and lower clamping device, AC adapter, manufacturer`s inspection certificate, USB cable 1.5 m, CD-ROM with driver, simple software for communication and data logging »ZT-Logger«, connecting cable and operation instructions in English

Instruction Manual

Download the instruction manual for torque stand MTS:

Product Videos

YouTube

By loading the video, you accept YouTube's privacy policy.
Learn more

Load video


Mounting the torque gauge and the clamping chuck; Adjusting the height of the chuck

YouTube

By loading the video, you accept YouTube's privacy policy.
Learn more

Load video


Manual Mode; Fine adjusting in jog mode

YouTube

By loading the video, you accept YouTube's privacy policy.
Learn more

Load video


Zero reset of peak values, automatic memory and output of measured values

YouTube

By loading the video, you accept YouTube's privacy policy.
Learn more

Load video


User settings


YouTube

By loading the video, you accept YouTube's privacy policy.
Learn more

Load video


One way mode (operation control with torque value and coninuous rotation period)

YouTube

By loading the video, you accept YouTube's privacy policy.
Learn more

Load video


Continuous mode (Setting, measurement, interruption)

If you want to get a quote or want to place an order, please contact us!


+49 (0)8638 9410-0

+49 (0)8638 4825